After losing all my rose bushes to Rose Rosette disease, I had a bunch of empty spots in my patio garden that needed to be filled. That gave me an idea. Why not redo the entire patio garden? This idea was not met with as much favor with the rest of the family who were roped into helping. My style is eclectic. It became a combination of laid-back beach vibes mixed with cottage/Southern garden and some upcycled junk decor. It sounds horrible on paper but the end results are fabulous. It’s almost finished so I can finally share my Patio Makeover Ideas.
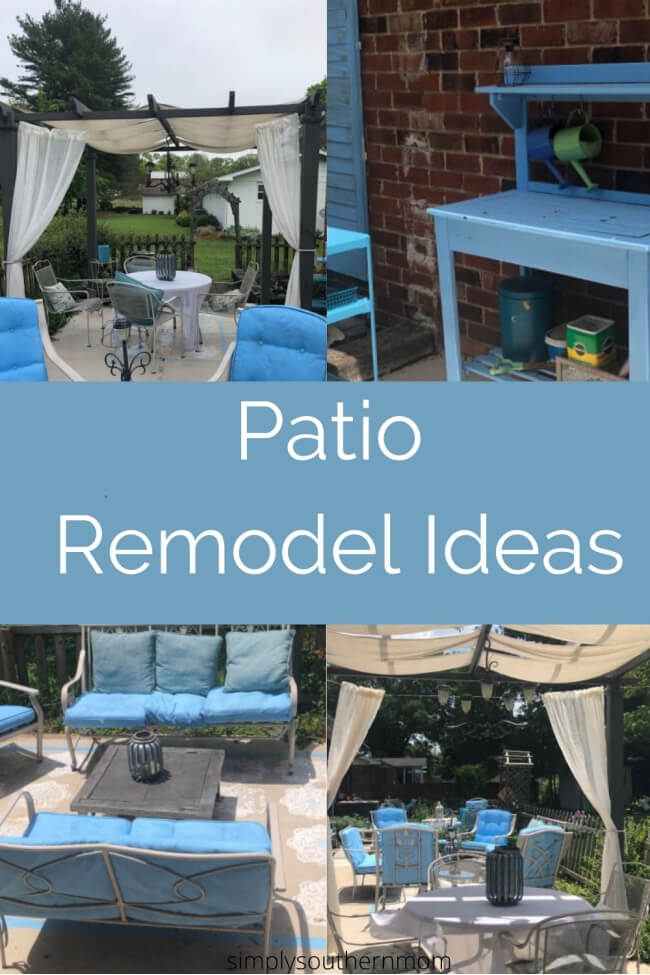
Patio Makeover Ideas
I started by redoing the concrete slab on the patio. Whoever installed the patio left deep cracks at least one inch deep between the slabs. I read blog posts and watched YouTube videos on repairing concrete. It looked easy. It is not. I started repairing the cracks in February. And kept repairing.
The concrete didn’t dry well in the cool weather and it took way more than I expected. I followed all the directions and there are still cracks in the concrete pads. If at all possible, if you have deep cracks and a lot of small concrete pads to join together, I suggest, if you can afford it, hiring a professional. They can repair in one to two days what took me a month to do. If you have small cracks, you can use QUIKRETE Concrete Repair to fill in cracks and use sandpaper to remove any excess concrete.
Painting a Concrete Rug
Once the concrete is repaired, the fun part starts; painting and sealing the concrete. I used H&C Tintable Deep Tint Base Solid Concrete Sealer from Lowes. It can be tinted in several colors and has both paint and sealer in one so you don’t have to purchase two separate products. Our patio is large enough that it required 2 (5-gallon) cans to provide the two coats required.
My rug was inspired by this post from Jenna Sue Design Blog (love that site!) who explains how to stencil the patio. Read the directions carefully. I overlooked the stencil brush and tried to use a paint roller to save time. Big mistake.
To make the rug, you’ll need a stencil, painter’s tape, a paintbrush, and paint in the colors of you’re choice. I used Kilz Complete Coat in Cool Vista for the stripes and Ace Gloss White Oil-Based Floor Paint for the stencil pattern.

Money-Saving Tip: You can purchase a 3-pack of stencil brushes for a buck in the craft section of Dollar Tree. I found my stencil in the $3 dollar clearance section of Michael’s.
I painted 4 “rugs” on my patio; a “welcome mat” sized rug at each entry point, a large rectangular rug at the patio seating area, and a square rug under the dining table.
I measured the length of the rug and outlined it with painter’s tape. I added another strip of painter’s tape approximately two inches from the first strip. I painted the inside of the strip with the Kilz’s, allowed it to dry, and then filled the inside of the rug with stencils using Jenna Sue’s instructions.
I finished by painting the entire patio with 2 coats of Seal-Krete 1-Part Clear Gloss Garage Floor Epoxy. This gave the entire patio a nice shine, allows water to bead on the concrete, and is easy to clean.
Patio Furniture
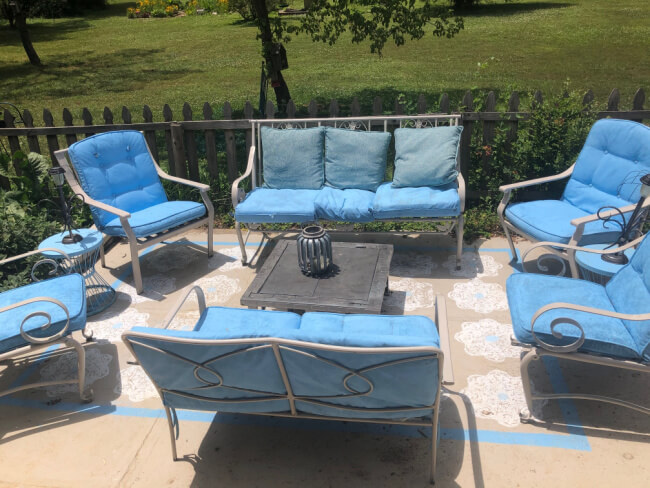
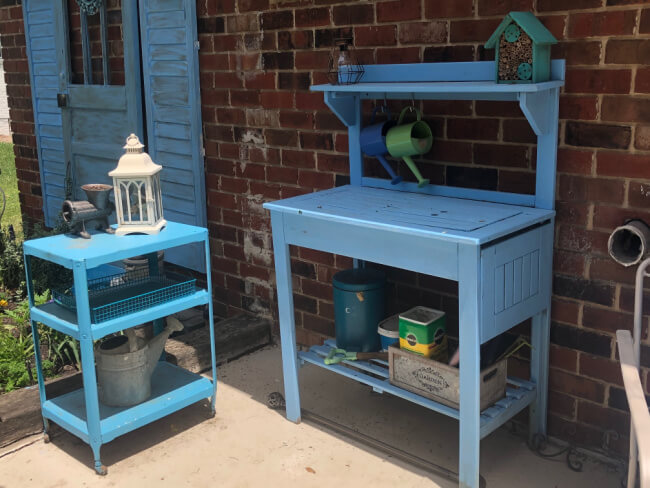
My furniture is mismatched. I have an antique patio set I snagged for $100 from Habitat for Humanity (a great place to look for bargains!), a patio set I purchased from Kmart’s going-out-of-business-sale, and a patio set I purchased from Craig’s List. The other patio pieces include a potting bench, a dining table, and a wooden cooler, along with an antique metal dining tray, some end tables, and a plant stand.
To pull the look together, I decided on a color scheme for the patio. I spray painted the furniture, dining table, and plant stand Smokey Beige using Rust-Oleum 2X Ultra Cover Paint and Primer. Beware: one can of paint only covered 1 piece of furniture. If I did this again, I’d purchase a gallon of paint to cut down on cost.
I painted the cooler, potting bench, and patio cushions with Kilz’s Cool Vista and finished by painting the end tables and cart Satin Lagoon using Rust-Oleum 2X Ultra Cover Paint and Primer. Yes! You can paint patio cushions, not just spray paint them. I’ll explain that in a later post.

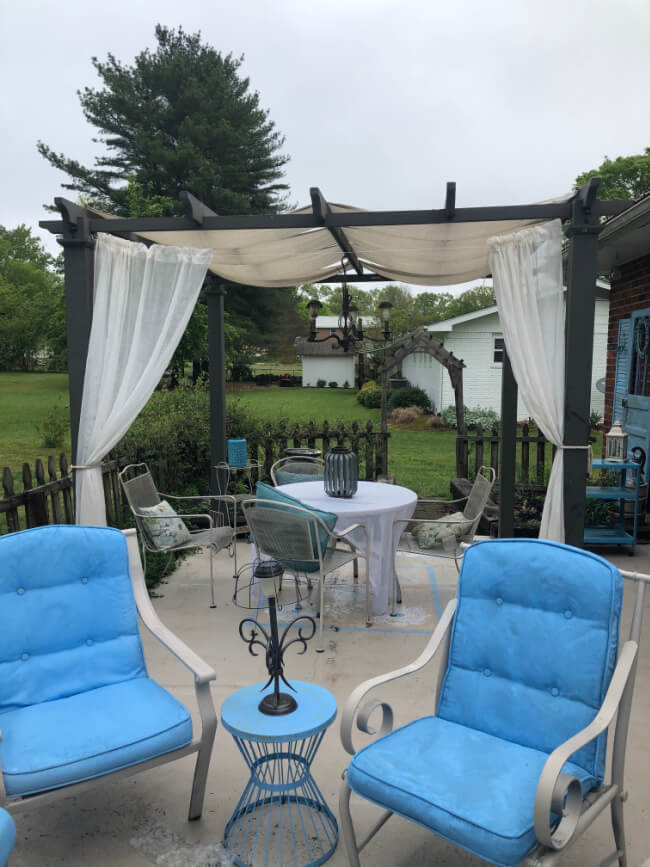
Pergola Perfection
Next, I tackled the pergola. Our area is often hit with 60 mph straight line winds, which had taken a toll on the poor pergola. We fastened the pergola to the concrete using deep concrete screws to add stability. The top cover had rotted so I replaced it with no sew panels I made with painter’s cloth.
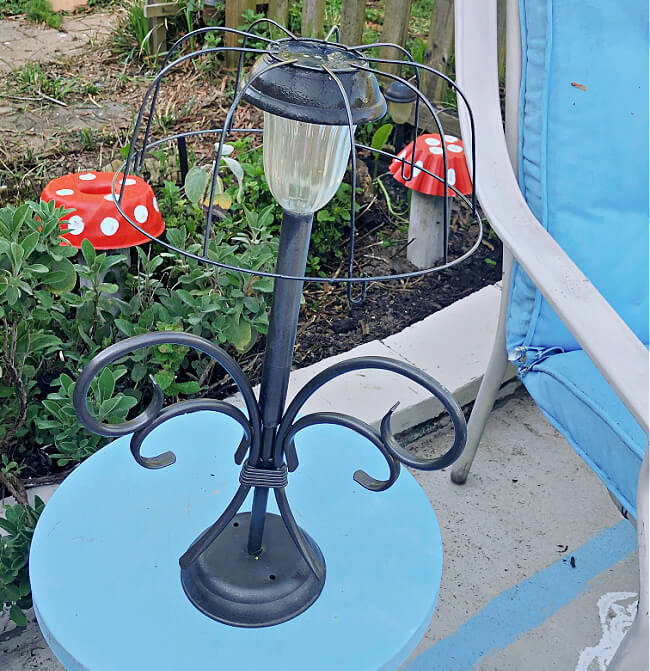
I found a $10 light feature at Habitat for Humanity (did I mention it’s my favorite place to shop for patio bargains? ) and converted it into a solar light fixture. We added it to the center of the pergola. The only problem? Dinner couldn’t be enjoyed on the patio thanks to the scorching Georgia heat. I added two sheer curtain panels I found at the thrift store for $3 to provide shade and a touch of tropical cheerfulness.
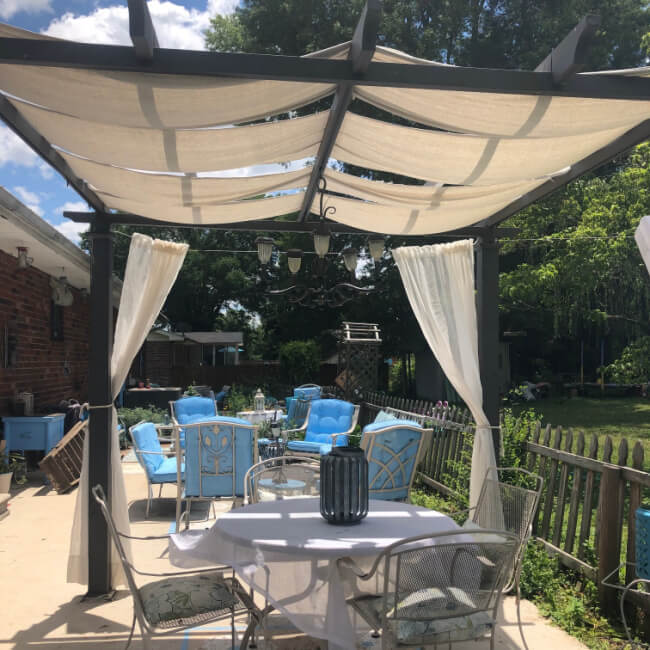
Hint: If you want the curtain panels to last, spray them with 3-M fabric protector before hanging.
Accessories
I’m adding a few extra touches, like metal lanterns and metal wall hangings to add a cozy touch. And, speaking of upcycling, I reused our rusted-out fire pit as a coffee table. I removed all of the rusted pieces, spray painted it with hammered Rust-Oleum paint (the same color I used on the wall furnishings and the chandelier) and placed two slate tiles over the top.
The final result is a calm, peaceful oasis where my family and neighbors want to hang out. In the future, I plan to add some string lights to the pergola and hopefully, rebuilding the steps into the house. Who could have imagined what a difference a few changes could make?
You Might Like These Posts:
Easy Upcycled Garden Decor
How to Make Easy Upcycled Garden Toadstools