I am (according to my neighbors) “that neighbor that likes to dig in the dirt.” And they’re right, I do. I spend hours planting and arranging, designing, and redoing if I don’t like the result. I’d like to say that garden creation is simple, but it’s not. I enjoy an eclectic mix; the cottage garden style, with flowers sprawling across the walkways, a beachy vibe, and native plantings. It sounds confusing but it works for me. Our Patio Gardens are always a work in progress, but here’s this year’s Patio Gardens Tour.
Backyard Patio Gardens Tour
If you missed part 1 of the Patio Gardens tour, including the seating area directly behind our back door, here are some new photos. It’s grown a lot since our first tour earlier this spring! If you missed the tour, you can find it here. I love how our gardens adapt through the seasons. I am planning to move some of the plants around as they grew taller than I expected. I’m looking at you, supposedly miniature zinnias.
Seating Area
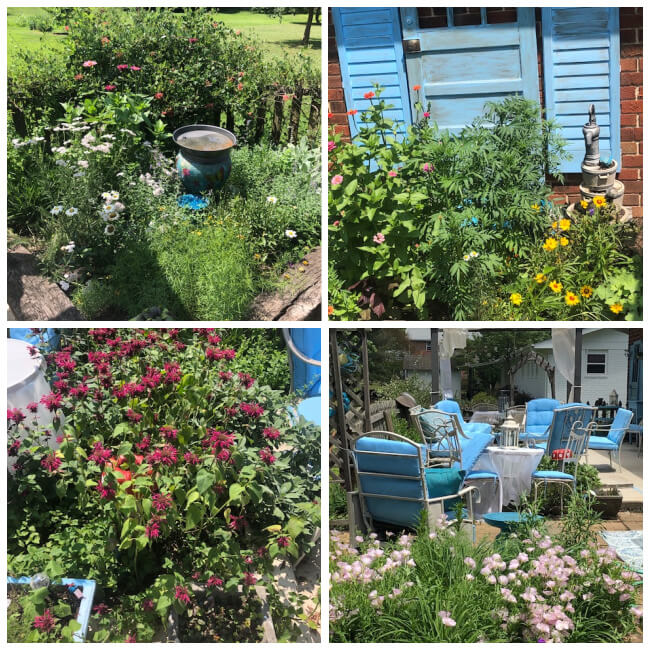
We never have enough seating when we host get-togethers. To combat that problem, I expanded the seating area by adding pavers beside our concrete patio several years ago. This year we redid the pavers, carefully following the directions from instructional manuals and professional how-to videos. Unfortunately, we are not professionals or -at this project- good DIYers. Even after following all the instructions, the pavers have shifted slightly since we placed them a month ago. Thankfully, it’s not as uneven as before, but still annoying for the amount of time and money spent.
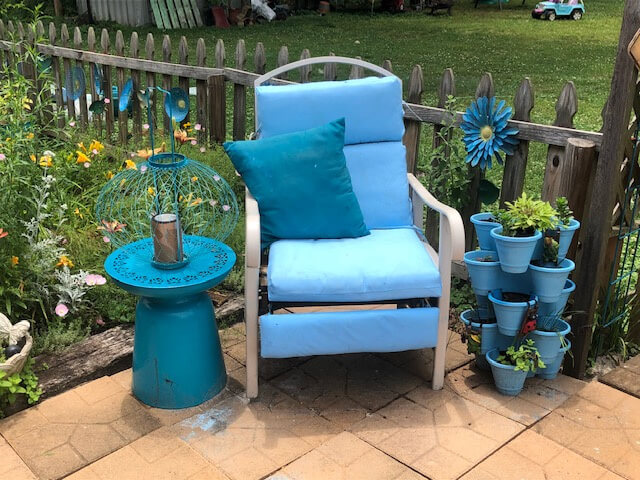
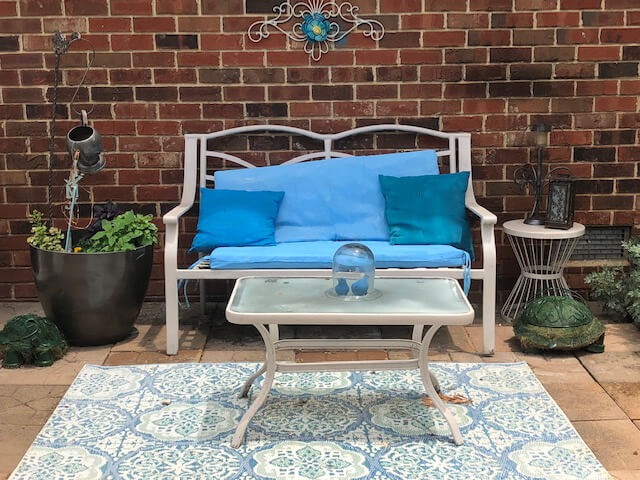
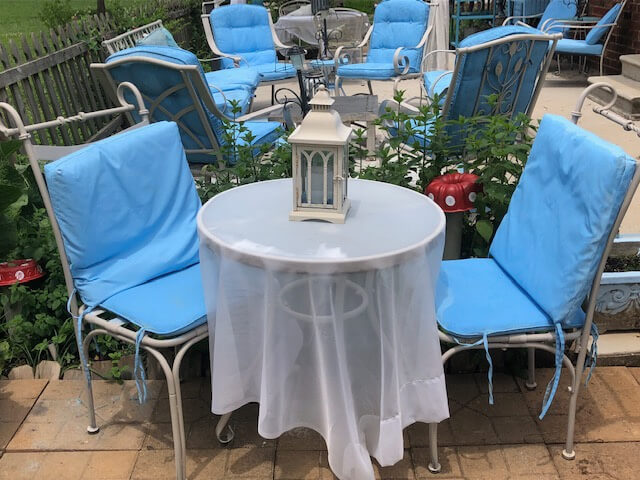
To seat more people, I added a loveseat, an outdoor recliner, and a cozy dining table and chairs for two in this area. I provided space to sit beverages and plates by adding a coffee table and two side tables. I already had these pieces on hand but they were mismatched. To create a unified look, I painted the furniture Smokey Beige and used painted the pillows light blue. I was afraid painted pillows wouldn’t hold up in our heat and humidity, but so far, so good.
The area needed a little “oomph” to give it an inviting feel. I painted several throw pillows a dark blue, draped a gauzy tablecloth over the table, and filled in with some accent pieces. I placed thrifted plant stands and ceramic flower pots filled with annuals and succulents in one corner. In another corner, I painted several stackable containers I found at Dollar Tree and filled them with easy-to-care-for plants like chives, sedum, and mint.
I’m amazed at the number of people who have commented on the stackable planter. So far, no one believes I purchased them from Dollar Tree. The conversation usually goes something like this:
“I love that planter.”
“Thanks. I got the stackable pots at Dollar Tree.”
“The Dollar Tree? Like the place you get stuff for a dollar? I’ve never seen them.”
I’m sure they probably didn’t. I grabbed mine from a huge stack on Tuesday. Two days later I returned to grab a couple more and they were gone. If you see these planters, grab them. They go quickly!
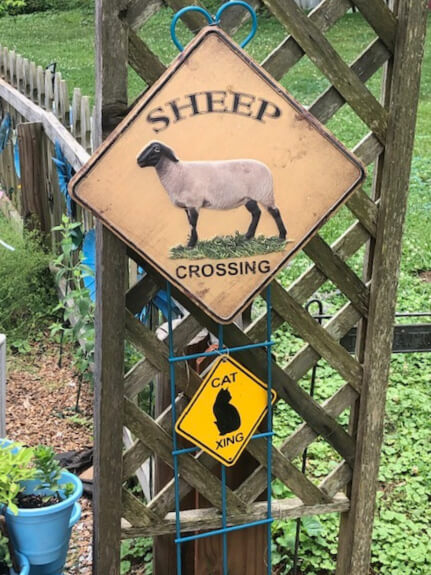
I wanted to use some of the gardening decor I’ve collected over the years but wasn’t sure where to place it. After reading a tutorial about decorating fences with thrifted materials, I decided to attach some of the pieces to our arbor. Now, when anyone enters, they are greeted with signs that read, “Sheep Crossing” and “Cat Crossing.” Yes, we raise sheep and I am probably a crazy cat lady in training. On the other side of the arbor, I attached a decorative watering can and a spray-painted “flower” made from an old Wilton flower cake pan.
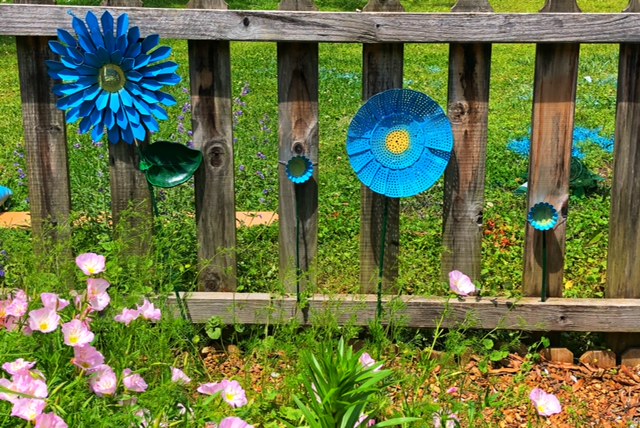
Our fence got a makeover too. I made “flowers” from old strainers I painted, leaves from small leaf-shaped trays, and stems from tomato stakes. Painted metal butterflies and lawn ornaments whose stakes had broken completed the look.
This is probably one of our favorite seating areas. It’s shady in the evening and allows us to see the entire backyard and garden area. It’s also secluded enough that no one can see us when we’re sitting outside.
The Pond
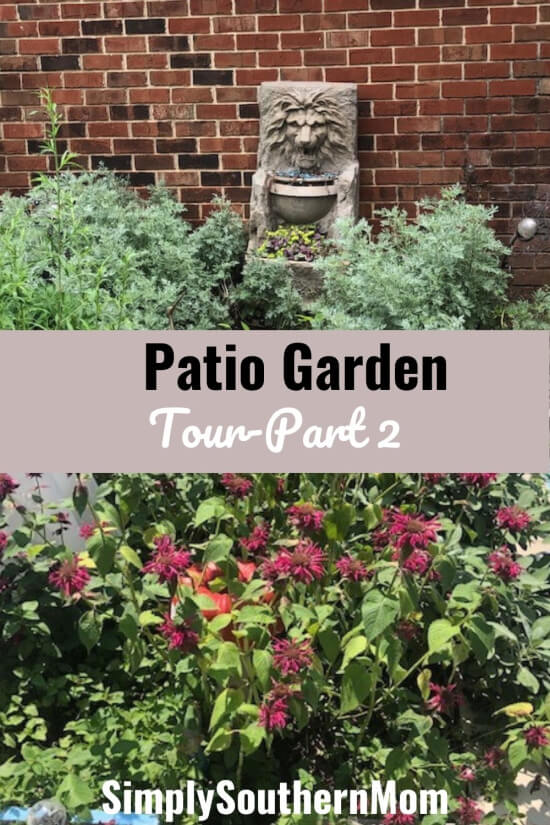
I wasn’t sure what to do with this flower bed because it was my “problem area.” The front of the garden received full sun while the back received part shade to shade. While plants grew well in the front, nothing- not even shade-loving plants- would grow in the back. It left an unplanted 1-foot space across the entire back of the bed. After several years of frustration, I decided to move the pond liner to this bed and place a fountain behind the pond. My reasoning? The fountain could cover part of the area where nothing would grow.
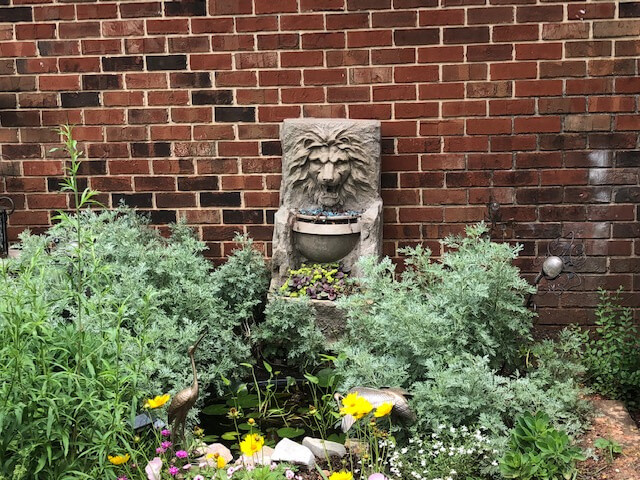
I positioned the fountain first to determine how much space it would cover. Then, we dug through mounds of red clay, which Bryan “helpfully” tossed onto the other flowers in the bed, to place the pond. I was impressed with the result. The pond and fountain complemented each other. Plus, I finally had a place where my fountain looked at home. For years, no matter where I placed the fountain, my kids mocked it and called it “Mom’s Narnia Fountain.”
I amended the bed by adding a mix of “Black Gold” soil to the clay. Next, it was time to research plants that could survive in the bed. One plant I discovered that worked well is Artemisia “Powis Castle.” I moved one plant to either side of the pond and it took off! It’s overgrown its space and has to be pruned often. Other plants enjoying this bed are Autumn Joy Sedum, Garlic Chives, and Wooly Thyme. I added one annual, a petunia plant, for color. Eventually, I will line the edge of the pond with stones.
I placed one shade plant in the back of the bed; two types of Japanese Sedge, for testing purposes. So far, they are growing but not thriving.
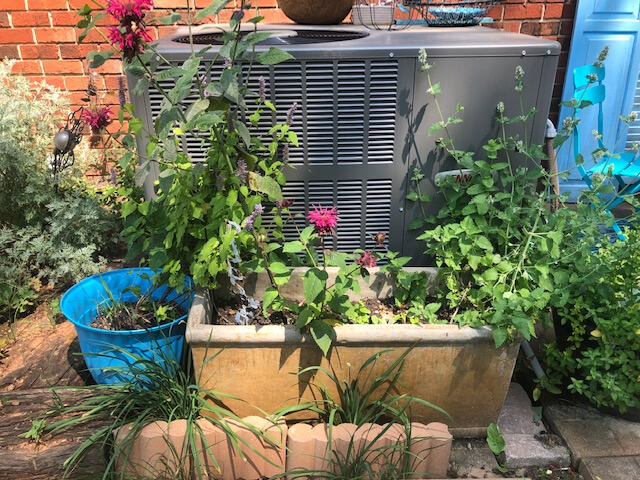
Air Conditioner Unit
Last year we had a new air-conditioning unit installed. The contractor promised me, “It will look so good you will be proud to have it in your garden.” I am skeptical that it adds the soothing touch I want in my garden. I plan to surround it with a small fence made of shudders. So far I haven’t found any in the right size. I’m searching at different Habitat for Humanity restores, but with the housing market shooting upward it seems everyone else is too.
Until I find the shutters, I’m ignoring the air-conditioning unit. I’ve tried giving it a slightly camouflaged look by placing several planters in front and beside the unit. I filled each planter with easy-to-care-for herbs; bee balm, catnip, mint, and chives. These herbs can grow almost anywhere, require little water once established, and are almost impossible to kill. They will also grow between one and three feet tall. Hopefully, that will help hide the unit.
We’re continuing our work on the patio; redoing more pavers-with the same unfortunate results- and attempting to expand a few flower beds. I’m sure the result will be worth it when we’re finished. At least that’s what I keep telling myself. When it’s finished, I’ll post part 3, the final patio reveal.
If you would like the easy DIY instructions for some of the projects, I have them listed below.
Easy Upcycled Garden Decor, How to Spray Paint Patio Pillows, and Patio Makeover Ideas. If you’d like to read more about low-growing ground covers to use in your garden, here are the ones I use.
What ideas are you using for your garden this year? Which plants are doing the best for you? Do you have a creative way to cover an air conditioning unit?