Thanks to #SearsGrilling and #cbias, this week I was able to purchase a grill of my own, much to Bryan’s delight. Secretly, I am delighted as well. He has offered to cook dinner on the grill several nights next week. With the added features and grilling accessories we bought, he can prepare the veggies and the meat, meaning less work for me!
For this week’s assignment, we were instructed to place the grill in an outdoor location and attempt to take shots using natural light. Unfortunately, the constant thunderstorms we have had for the week left me trying to capture photos between showers, with the grill setting on my patio, pushed against the wall of my home. Although I swept my patio several times, there were still unflattering water spots in several of my photos.
Our first technique, practicing using soft lighting was no problem. The cloudy sky provided a cover. I also tried taking some pictures in the evening when the sun, which managed to barely peek through the clouds a few times, was low in the sky.
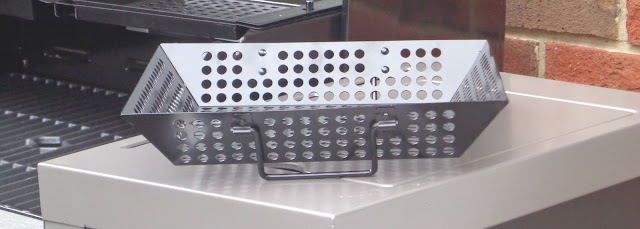
Practicing with the Zoom button allowed me to capture the accessories “up close and personal,” to show all of their features.
Another suggestion, overexposing the scene slightly with our camera or with our editing software, produced softer photographs without sharp, glaring colors.
Another tip to add a “professional touch”- placing the accessories in believable locations around the grill or on the kitchen counter. I liked this shot that included all my cooking accessories.
These pictures of my grilling baskets made me want to grab some veggies and meat and begin preparing the meal. By cropping, adjusting the exposure, and highlighting the baskets, it focuses attention on the product, not the surroundings.
By experimenting with those suggestions and by using a bounce card to reflect light, I feel my pictures are improving even before I try my edit techniques. I look forward to someday being able to create pictures that “pop.” It’s a work in progress and requires a lot of trial and error, but I know the results will be worth it in the end!


great shot of the grill cover I hard a hard time getting a shot of it! 🙂
Love the framing on the last picture, but I would of probably played with the exposure more of adjusted black and whites. Love the grill
Love the framing on the last picture, but I would of probably played with the exposure more of adjusted black and whites. Love the grill
Nice BBQ! I got the slider basket as well and can’t wait to use it. 🙂
I think your doing a great job taking photos and think your grill looks like such a nice one that you will enjoy it.
LOVE your tips on how to take better pictures; your pic’s sure turned out great.. BUT then again you had an amazing Object..lol… my hubby would die for a grill like yours.. enjoy it and I can’t wait to hear all the yummy recipes you will create with this….
Looks like a fantastic grill! Thanks for posting this!
Love your suggestions and will put some to use. I like the natural shot, too, and the up close of the basket. Makes me want to grill right now!
Beautiful grill, too, no doubt you will have great fun and good grub with it 🙂
What a wonderful grill! We have a nice one and even I am envious! Let me know when your next BBQ is…I’m there! Some great shots!
When taking photos I take like 20 shots to everyone I actually use..lol trial and error is right. I do see a lot of improvement in your photos however. Great job
that is pretty sweet!
Pam, great job and I’m so excited for you and your new grill chef! Can’t wait to see what you make!
You are so right when you said it is a trial and error thing! I take SO MANY pictures!